

_____________________________________________________________________________________________________________
5 star banana bread in 8 x 8
Hello my dear readers,
5 star cookies will continue “the banana trend”.
From Banana Tea Dessert and Banana Help Tea to this Goddess recipe .
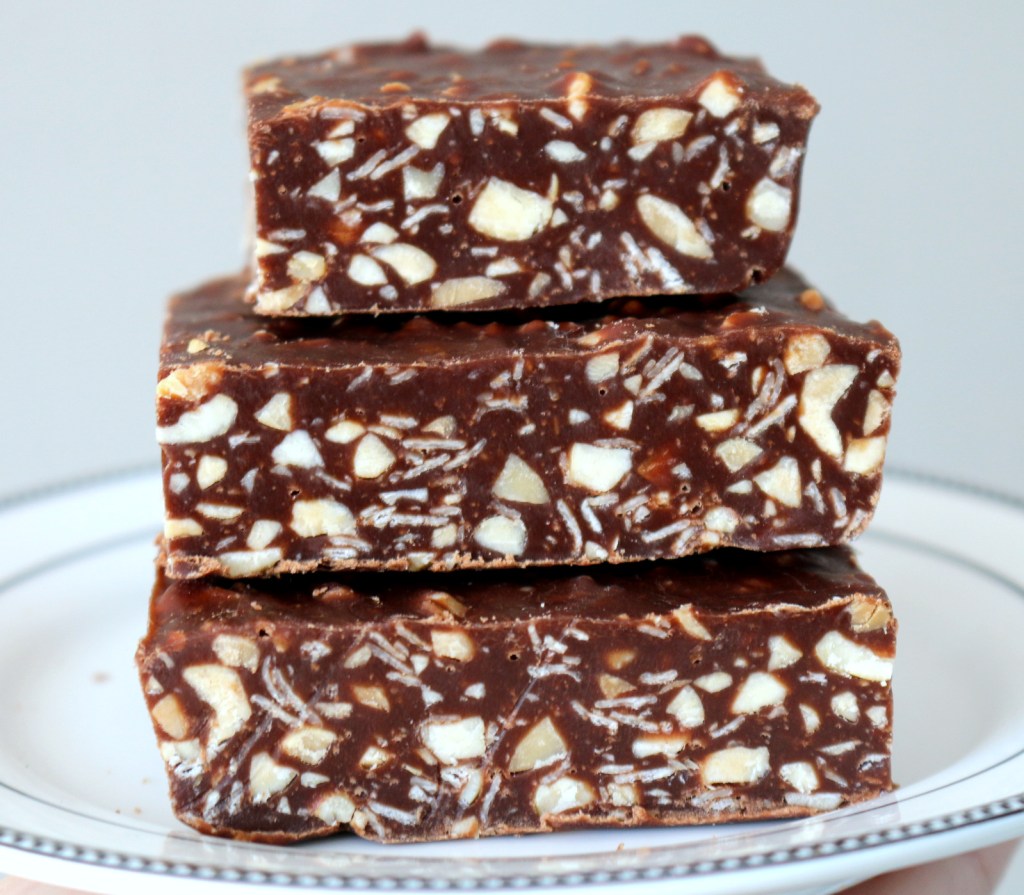
The name is 5 star Banana Bread in 8×8.
If you are like me and you don’t have much time to spare, you want your
dessert to be done as soon as possible.

And because my banana bread takes long time to bake…almost 60 minutes…
I started to think. And think. Einstein, please move away.
I don’t need your ironic cheers…It is 21 century and this is our time.
Meanwhile Albert Einstein is laughing, laughing and then he said:
-Still in the kitchen and still cooking… apparently slow….”I love you Me Too.”
Something in that sentence make me sick and I can’t stop thinking…
Even a dead man has more power than woman in the kitchen…
So, how can I change that?
Take one thing at the time – says wise woman.
And because of that, I decide to start with 5 star banana bread.
This historic recipe will have an amazing makeover and a new life.
In a glass pan or 8 x 8 square baking dish.

So, let’s start with…
Shopping list
You will need to buy the following ingredients:
- butter (organic, unsalted)
- flour
- eggs
- sugar
- walnuts
- chocolate chips
- ripe bananas
- pure vanilla extract
- baking soda
- salt
ACTION TIME
How to make 5 star banana bread in 8 x 8?

Ingredients
1/2 cup butter
3/4 cup white sugar
2 eggs
1 tsp vanilla extract
1 cup ripe bananas, mashed using fork
1 1/2 cups flour (AP, unbleached)
1 tsp salt
1 tsp baking soda
1 1/2 cups walnuts (chopped)
3/4 cup chocolate chips
3 TBSP ground hazelnuts
INSTRUCTIONS
Preheat oven to 350 F.
Line 8 x 8 glass pan with aluminum foil.

Mix all ingredients Pour into 8 x 8 glass pan Bake at 350 F for 40 min.


In a bowl #1 add flour, baking soda and salt. Set aside.
Using a mixing bowl, mix together butter and sugar.
After that, add eggs and mix until incorporated.
Your next step is to add mashed bananas, vanilla extract and mix quickly.
Finally add flour mixture to the batter.
And you are almost done.
Your last step is to mix in chocolate chips and walnuts.
Pour into prepared 8 x 8 glass pan and bake at 350 F for about 40 minutes.
How to check if banana bread is done?
Insert a toothpick into the center of bread and if comes out clean…it is done.

Cool it.
Optional:
Cover with melted chocolate.
Cut into desired sizes.
Serve with sliced banana, your favorite ice cream or caramel sauce.
To print this recipe, please check the box below.
Above all, don’t forget:
PRINT – MAKE – SHARE

How to make 5 star banana bread in 8 x 8?
It is truly the best or Melania will say "BE BEST".
And be it is. It is the best 5 star banana bread in glass pan, 8 x 8.
Moist and delicious, full of banana flavor and super easy to make.
Above all, the most versatile snack in the Universe.
Ingredients
- 1/2 cup butter
- 3/4 cup white sugar
- 2 eggs
- 1 tsp vanilla extract
- 1 cup ripe bananas, mashed using fork
- 1 1/2 cups flour (AP, unbleached)
- 1 tsp salt
- 1 tsp baking soda
- 1 1/2 cups walnuts (chopped)
- 3/4 cup chocolate chips
- 3 TBSP ground hazelnuts
Instructions
Preheat oven to 350 F.
Line 8 x 8 glass pan with aluminum foil.
In a bowl #1 add flour, baking soda and salt. Set aside.
Using a mixing bowl, mix together butter and sugar.
After that, add eggs and mix until incorporated.
Your next step is to add mashed bananas, vanilla extract and mix quickly.
Finally add flour mixture to the batter.
And you are almost done.
Your last step is to mix in chocolate chips and walnuts.
Pour into prepared 8 x 8 glass pan and bake at 350 F for about 40 minutes.
How to check if banana bread is done?
Insert a toothpick into the center of bread and if comes out clean...it is done.
Cool it.
Optional:
Cover with melted chocolate.
Notes
Serve with melted chocolate, your favorite ice cream or caramel sauce.
Most importantly, are you ready to eat?
Cut your favorite cake, decorate and enjoy.

Description
It is truly the best or Melania will say “BE BEST”.
And be it is. It is the best 5 star banana bread in glass pan, 8 x 8.
Moist and delicious, full of banana flavor and super easy to make.
Above all, the most versatile snack in the Universe.

FINAL NOTE
A+ recipe and the best makeover. Ever. In 8 x 8 glass pan.
Enjoy and share.

More BANANA RECIPES
Banana Tea Dessert-Sweet Sleep

If you can’t sleep, please check this link.
Banana Help Tea – Sleepless in Seattle

If you want to know why I have some issues with man called Einstein, please check this link.
Vintage Grandma’s Nostalgia Cake

Other Recipes from this blog
The best fudgy traditional brownies
Imperial Vanilla Cake – Take Action
Caramelized Lazy Hazelnuts-100 Percent Easy
Hero Open Sandwich-You are my hero
Chocolate Croissants Cake-Third Eye Awakening
Oven Hot Cheese Sandwiches-Coming Home
Lindor Hazelnut Hot Chocolate-Lindt Joy
Chestnut Praline Latte-Save Big Now
Chocolate Chip Cookies Roulade – Instant aah…

5 star cookies – Top 60 Canadian Food Bloggers To Follow in 2019
Please visit the page – LINK
FOOD GAWKER – 5STARCOOKIES.COM
Thank you for visiting the best food blog, 5starcookies.
Love and hugs
from your
Cookie
See you soon…

Be Kind…Always! Please.


